Short Answer: To use a digital piano as a MIDI controller, connect it to your computer using a USB or MIDI cable, and then configure it in your digital audio workstation (DAW) software as a MIDI input device.
MIDI (Musical Instrument Digital Interface) technology has revolutionized the world of music production over the past few decades. MIDI allows electronic instruments like synthesizers, drum machines, and digital pianos to communicate with each other and computer software through digital data, opening up endless creative possibilities for music makers.
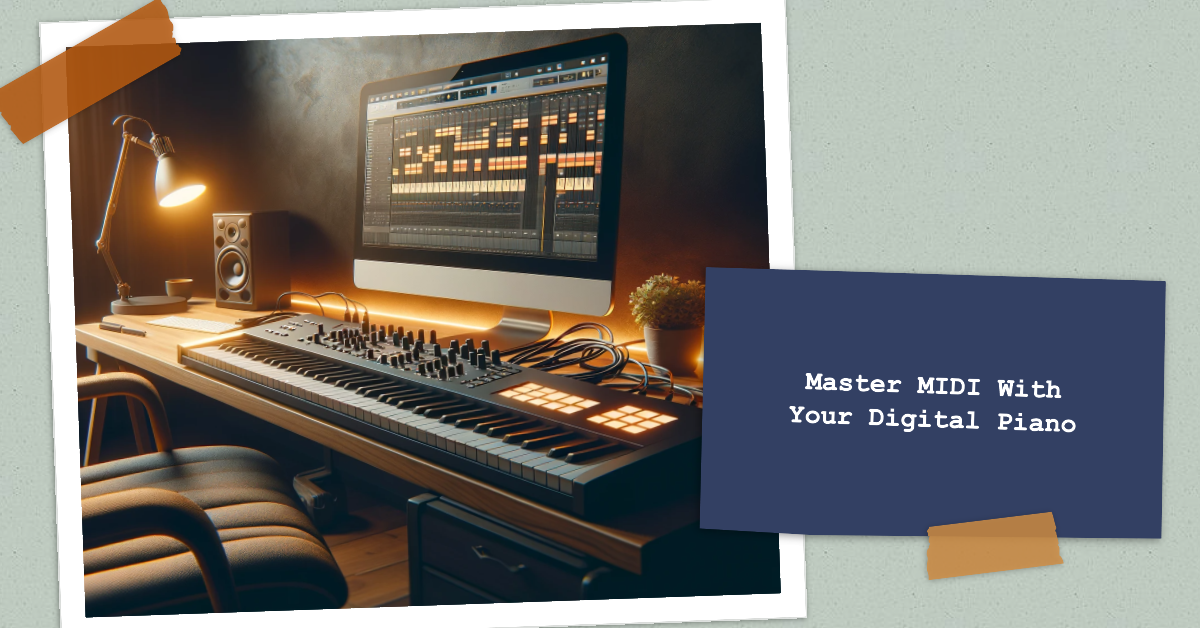
Using a digital piano as a MIDI controller unlocks powerful music production capabilities and provides expressive control over virtual instruments. A digital piano used as a MIDI controller allows you to play and record MIDI data from the piano keyboard into music production software like Ableton Live, Logic Pro, FL Studio, and more.
The MIDI data can then be used to trigger and manipulate virtual software instruments, making the digital piano a versatile tool for music composition, songwriting, and performance.
There are several key benefits to using a digital piano as a MIDI controller:
- Access to a wide variety of virtual instrument sounds beyond the onboard sounds of the digital piano itself. Virtual instruments can emulate acoustic instruments like pianos, guitars, orchestral instruments, and more, or be entirely synthetic.
- Ability to record, edit, and manipulate MIDI performances with music production software. This allows for music creation possibilities that would not be possible with a digital piano alone.
- Expressive MIDI control with the nuanced playing dynamics of the digital piano keyboard. Features like weighted keys, hammer action, and touch sensitivity translate into more emotional MIDI performances.
- Cost-effective way to get into music production without investing in an expensive MIDI keyboard controller, especially for those who already own a suitable digital piano.
- Portability for music production on the go when using a stage piano or high-quality portable digital piano.
This guide will walk through the equipment needs, setup steps, and practical applications to get started using your digital piano as a powerful MIDI controller.
| Key Takeaways |
|---|
| MIDI technology allows digital instruments to communicate and integrate with computer software for music production. |
| Digital pianos can serve as MIDI controllers by connecting to a computer via MIDI or USB cables. |
| As a MIDI controller, the digital piano can play virtual software instruments from MIDI recording apps like DAWs. |
| MIDI provides expressive control features like velocity, pitch bend, modulation, and more. |
| MIDI controllers can be assigned to manipulate parameters of virtual instruments. |
| MIDI effects like reverb and delay can be applied to enhance virtual instrument sounds. |
| Proper MIDI connections and low latency settings optimize the digital piano’s performance. |
| MIDI opens up limitless creative possibilities for music composition, songwriting, and performance. |
Setting Up Your Digital Piano as a MIDI Controller
To use your digital piano as a MIDI controller, you’ll need to connect it to a computer running digital audio workstation (DAW) software or other MIDI recording applications. Here’s an overview of the equipment and connections involved:
Identifying the Necessary Equipment
- Digital piano with MIDI ports – You’ll need a digital piano outfitted with MIDI ports, usually MIDI Out and sometimes MIDI In as well. Most contemporary digital pianos have onboard MIDI capabilities.
- USB-to-MIDI adapter cable OR MIDI cables – To connect your digital piano to your computer, you can use a USB-to-MIDI adapter cable or traditional 5-pin MIDI cables. USB-to-MIDI adapters are more common today for convenience of setup.
- Computer with DAW or MIDI recording software – You’ll need music production software capable of receiving and recording MIDI data, such as Ableton Live, Logic Pro, Pro Tools, FL Studio, Reaper, and more.
Connecting the Digital Piano to the Computer

There are two main options for connecting the MIDI ports of your digital piano to your computer:
USB-to-MIDI Adapter Cable:
- Connect the MIDI Out port on the rear of the digital piano to the MIDI In port on the USB-to-MIDI adapter cable.
- Connect the USB end of the adapter cable to an open USB port on your computer.
MIDI Cables:
- Connect a 5-pin MIDI cable from the MIDI Out port on the digital piano to the MIDI In port on your computer’s MIDI interface.
- Most computers do not have legacy MIDI ports, so you’ll need a separate MIDI interface unit.
Configuring the DAW or MIDI Software
Once connected, you’ll need to setup your recording software:
- Open your DAW or MIDI recording software on the computer.
- In the preferences/settings, select the USB-to-MIDI adapter or MIDI interface as the MIDI input device.
- You may need to adjust MIDI sensitivity and velocity curve settings to optimize the dynamics and expression of the digital piano.
- Set the MIDI channel inputs to match the channels from your digital piano.
The software is now ready to receive MIDI data from the digital piano controller.
Playing Virtual Instruments with Your Digital Piano
One of the biggest advantages of using a digital piano as a MIDI controller is being able to play virtual software instruments from the keyboard. Here’s an overview:
Choosing Virtual Instruments
Most DAWs come with a selection of virtual instrument plugins including synthesizers, samplers, drum machines, and more. You can also expand your virtual instrument library through paid or free plugins from third-party developers. Consider your musical preferences and target genres when selecting virtual instruments.
| Genre | Recommended Virtual Instruments |
|---|---|
| Pop/Rock | Electric and acoustic pianos, drums, guitars |
| EDM/Dance | Synths, drum machines, sampler |
| Hip-hop | Sampler, vinyl scratching FX, drum machines |
| Jazz | Acoustic piano, upright bass, drums, vibraphone |
| Classical | Orchestral strings, woodwinds, choirs |
Popular options include:
- Piano and keyboard instruments (ex. Native Instruments Komplete Kontrol, Arturia Piano V)
- Orchestral and strings (ex. Spitfire Audio Albion One, EastWest Quantum Leap)
- Synths and electronic instruments (ex. Native Instruments Massive, Arturia V Collection)
- Drum machines and percussion (ex. Native Instruments Battery, XLN Audio Addictive Drums)
Assigning Virtual Instruments to MIDI Channels
Most MIDI recording software allows you to assign different virtual instruments to specific MIDI channels. For example:
- Set virtual piano plugin to receive on MIDI channel 1
- Set virtual synth plugin to receive on MIDI channel 2
On your digital piano, configure the MIDI channels to match. Often channel 1 is the default. This allows you to selectively trigger different instruments from the keyboard.
Playing and Recording with Virtual Instruments
Once properly setup, you can play the digital piano keys and hear the virtual instruments through your computer speakers or studio monitors, as well as record MIDI performances to the DAW:
- Play notes and chords on the digital piano to trigger the virtual instrument sounds.
- Use the DAW to record your virtual instrument performances as MIDI data.
- Edit and manipulate the MIDI data, change instruments, adjust mixing, and more.
Utilizing MIDI Features for Advanced Control
Beyond just triggering virtual notes, your digital piano MIDI controller opens up deeper creative possibilities by utilizing MIDI’s expressive capabilities:
Exploring MIDI Controllers and Expressions
| MIDI Controller | Description |
|---|---|
| Velocity | Determines how loud a note sounds based on key strike velocity |
| Aftertouch | Controls parameters via pressure on keys after initial strike |
| Pitch Bend | Bends the pitch up or down |
| Modulation Wheel | Adds vibrato by rolling the wheel during play |
| Sustain Pedal | Sends continuous controller messages for sustain |
MIDI allows for control signals beyond just note on/off. Digital pianos may support additional MIDI control messages including:
- Velocity – how hard the key is struck, affects volume and timbre
- Pitch bend – bending the pitch up or down
- Modulation wheel – adding vibrato by rolling the wheel
- Aftertouch – pressure applied after the initial keystrike
- Sustain pedal – continuous controller messages
These continuous controllers allow you to add expression and nuance when playing virtual instruments for more realistic and dynamic performances.
Assigning MIDI Controllers to Parameters
By assigning MIDI control signals to specific parameters within your virtual instruments, you can manipulate sound characteristics in real-time as you perform:
- Map pitch bend to control virtual guitar string bends or synth filter sweeps.
- Assign aftertouch to control synth brightness or timbre.
- Map modulation wheel to chorus/flanger depth or rotary speaker speed.
Get creative and see how you can customize your virtual instrument mappings.
Utilizing MIDI Effects and Processors
You can also apply MIDI effects and processors to enhance your virtual instrument sounds:
- MIDI delay to echo notes on piano or drums.
- MIDI reverb for huge spaces on synth pads.
- MIDI modulation effects like chorus, flanger, and phasers.
- MIDI arpeggiators to generate melodic sequences and patterns.
Chaining together MIDI effects expands the possibilities further.
Troubleshooting and Tips for Optimal Performance
To ensure your digital piano MIDI controller setup provides the best performance and reliability, keep these tips in mind:
Identifying and Resolving Common MIDI Connection Issues
If experiencing problems with MIDI connectivity, first check:
- Cable connections from the digital piano into the computer or MIDI interface.
- Power connections and power switches for the digital piano and other MIDI devices.
- MIDI settings in your DAW to ensure the proper device is selected.
Also update MIDI drivers and firmware for the digital piano, computer, and any MIDI interface or adapter hardware.
Optimizing Latency for Real-Time Performance
| Approach | Details |
|---|---|
| Lower buffer size | Smaller buffer = lower latency but may impact stability |
| Use dedicated audio interface | Reduces latency compared to onboard sound cards |
| Upgrade computer processing power | Faster CPU and more RAM reduces latency |
| Disable unnecessary plugins | Too many plugins can increase latency |
| Optimize DAW settings | Adjust sample rate, bit depth to find optimal balance |
Latency refers to the delay between playing a note on the keyboard and hearing the virtual instrument sound. To minimize:
- Use a dedicated audio interface with dedicated ASIO drivers for low latency.
- Adjust buffer size settings in your DAW – lower buffer size equals less latency.
- Optimize your computer’s processing performance.
Ideally, you want latency under 10-15ms for responsive playing.
Exploring Advanced MIDI Techniques
To take your MIDI use further:
- MIDI syncing with multiple devices/DAWs locked to the same clock.
- MIDI mapping for more custom virtual instrument control.
- MIDI scripting for tailored control interfaces.
Continue learning more about MIDI’s powerful capabilities for creative music production.
Final Words
Connecting a digital piano as a MIDI controller opens up a world of possibilities for music creation and performance. With the right cables and software, you can access virtually any sound imaginable, record expressive performances, and tap into deep MIDI control. Start slowly, optimize your setup’s reliability, and explore MIDI’s capabilities to enhance your digital piano and take your musicianship to new levels. The world of music production awaits!