A. Brief history of digital pianos
1. Evolution from traditional pianos
Digital pianos have come a long way since their inception, evolving from their traditional piano counterparts. The acoustic piano has been a staple in music for centuries, but with the advent of technology, digital pianos have taken center stage. They offer the same functionality as acoustic pianos but with the added benefit of portability, versatility, and a range of digital features.
Read more about: Digital vs Acoustic Piano
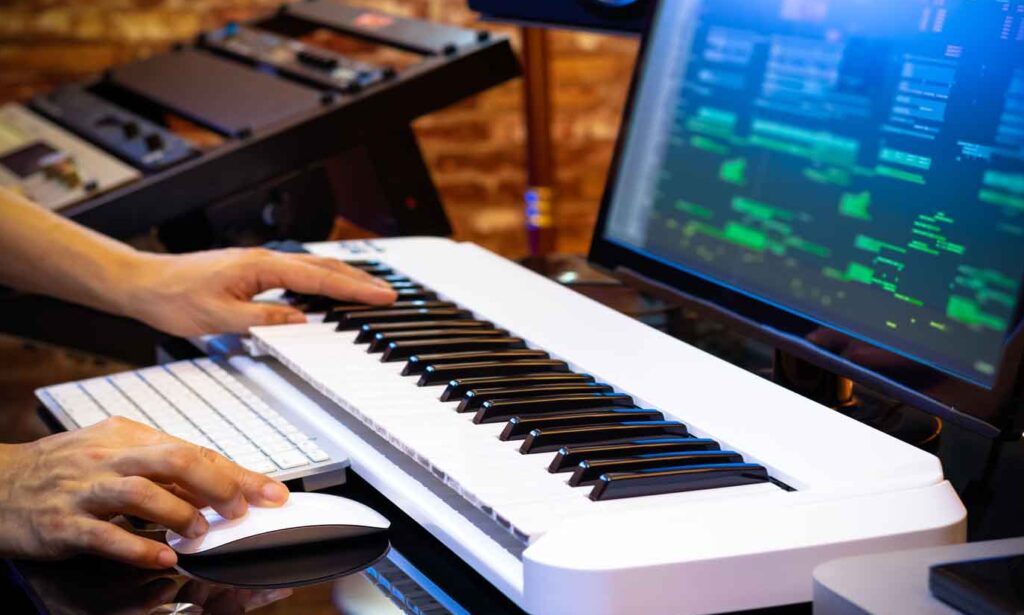
2. Integration of technology in modern music production
In recent years, technology has been rapidly integrated into music production, making digital pianos an essential instrument for modern musicians. With digital pianos, musicians can now experiment with a wide variety of sounds and effects, making them an integral part of contemporary music composition and production.
B. Importance of connecting digital pianos to other devices
1. Expanding the range of sounds and effects
By connecting digital pianos to various devices, musicians can expand their sonic palette and access a plethora of new sounds and effects. This allows them to create unique and innovative compositions, pushing the boundaries of traditional music-making.
2. Recording and editing capabilities
Digital pianos can be connected to computers, iPads, and Android devices for advanced recording and editing capabilities. This enables musicians to record their performances and edit them using Digital Audio Workstations (DAWs) and other specialized software, making it easier than ever to produce professional-quality recordings.
3. Collaboration with other musicians
Connecting digital pianos to other devices also opens up opportunities for collaboration with other musicians. By sharing their work digitally, musicians can collaborate remotely, exchange ideas, and create new projects together. This has fostered a global community of musicians, allowing them to work together regardless of geographical boundaries.
C. Overview of devices that can be connected to a digital piano
1. Computers (Windows, Mac)
Digital pianos can be connected to both Windows and Mac computers, making them a versatile option for musicians working with different operating systems. This enables seamless integration with various software applications and DAWs, enhancing the capabilities of the digital piano.
2. iPads and other iOS devices
iPads and other iOS devices can also be connected to digital pianos, providing a portable solution for musicians on the go. With a range of compatible apps and software available for iOS devices, musicians can create, record, and edit their music with ease.
3. Android devices
Similar to iPads, Android devices can be connected to digital pianos, offering even more flexibility for musicians. A variety of Android-compatible apps and software enable users to take full advantage of their digital piano’s capabilities, making it a versatile and powerful instrument.
D. Purpose of the blog
1. Provide a comprehensive guide to connecting a digital piano to various devices
This blog aims to provide a comprehensive guide on how to connect digital pianos to different devices, including computers, iPads, and Android devices. By following the instructions provided, musicians can unlock the full potential of their digital piano and enhance their music-making experience.
2. Enhance the user experience and unlock the full potential of digital pianos
By connecting digital pianos to various devices, musicians can access a wide range of features and capabilities that might not be available on the digital piano alone. From recording and editing their performances to experimenting with new sounds and effects, connecting a digital piano to other devices can significantly enhance the user experience and unlock the instrument’s full potential.
A. Required equipment and preparations
1. Cables and connectors
a. USB (Type A to B, Type C)
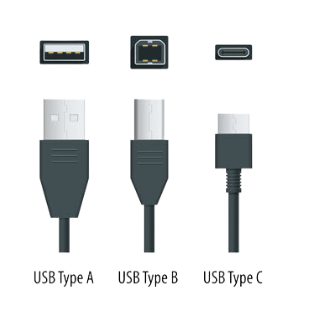
USB cables are commonly used to connect digital pianos to various devices. They come in different types, such as Type A to B and Type C. Ensure you have the appropriate USB cable that corresponds with your digital piano and the device you wish to connect it to.
b. MIDI (5-pin DIN, 3.5mm TRS)
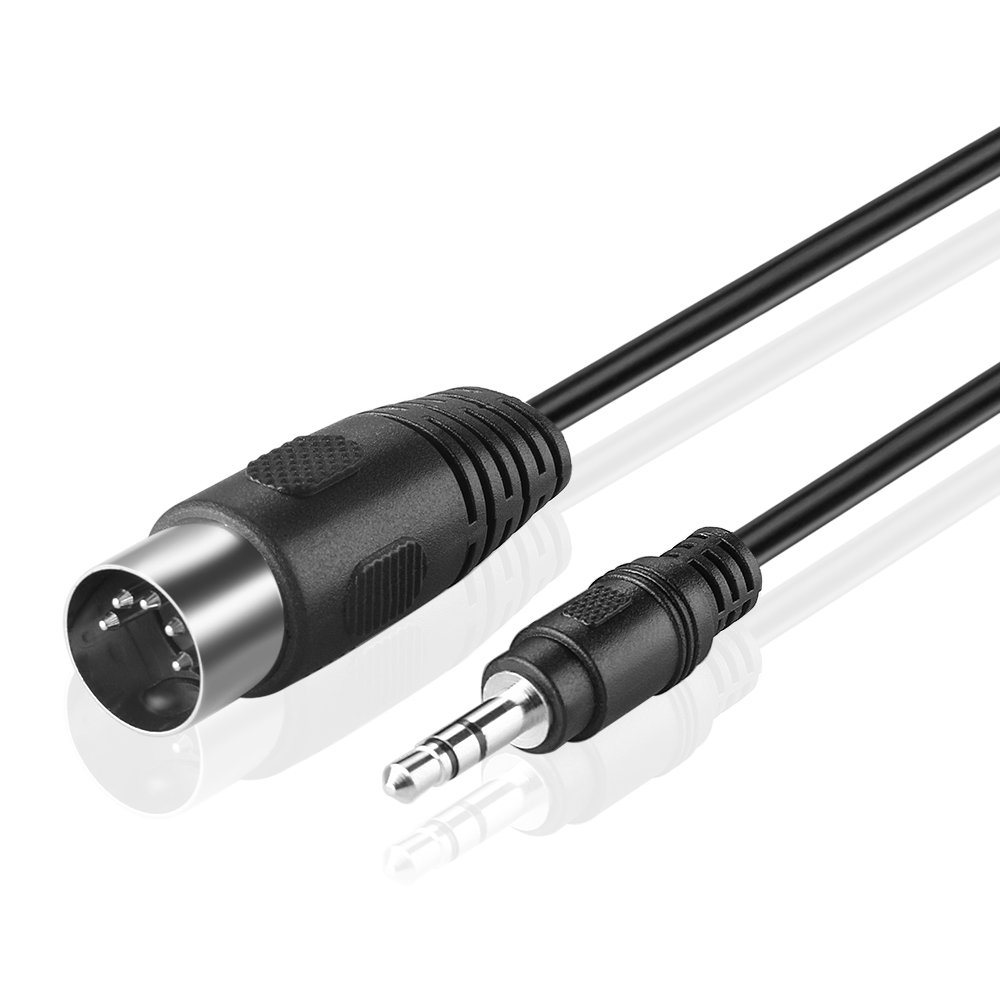
MIDI cables, such as 5-pin DIN and 3.5mm TRS, are also used to connect digital pianos to other devices. These cables transmit MIDI data between the devices, allowing them to communicate with each other.
c. Audio interface (optional)
An audio interface can be used for connecting your digital piano to a computer, iPad, or Android device if it doesn’t have a built-in USB or MIDI interface. The audio interface converts the analog signal from your digital piano into a digital signal that your device can process.
2. Device compatibility
a. Check the digital piano manual or manufacturer’s website
Before attempting to connect your digital piano to any device, consult the manual or the manufacturer’s website to ensure compatibility. This will help you determine the correct cables and connectors to use.
b. Update devices to the latest software version
Keep your devices up-to-date by installing the latest software updates. This ensures the best performance and compatibility between your digital piano and the connected device.
3. Software and apps
a. DAWs (Digital Audio Workstations)
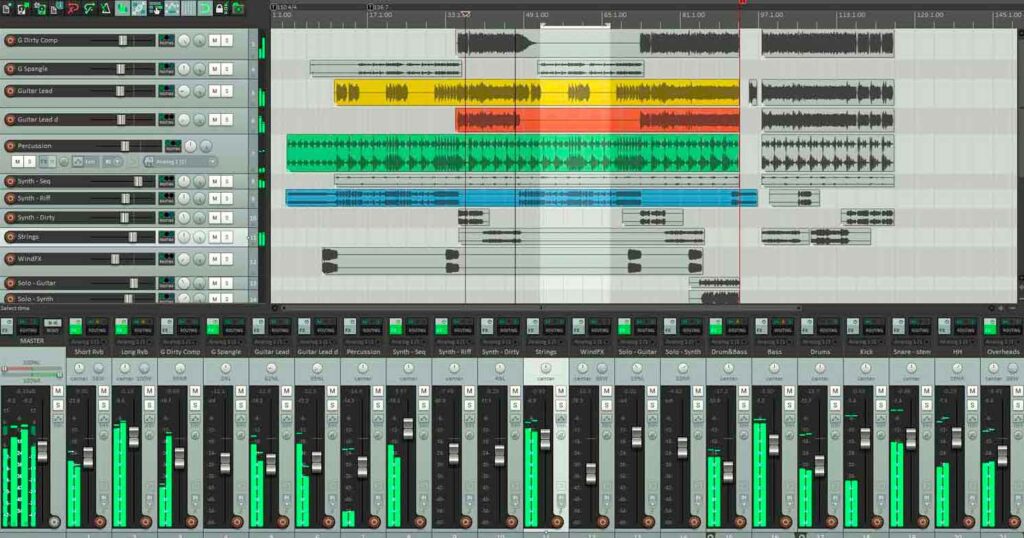
Digital Audio Workstations (DAWs) are essential for recording, editing, and producing music. Popular DAWs include Ableton Live, FL Studio, and Logic Pro.
b. Virtual instruments and synthesizers
Virtual instruments and synthesizers can be used to expand your digital piano’s sound library. They offer a wide range of instruments and effects, allowing you to create unique and diverse compositions.
c. MIDI controllers and editors
MIDI controllers and editors enable you to control and manipulate your digital piano’s settings, such as sound selection, volume, and effects. These tools can be especially useful for live performances and recording sessions.
B. Connecting a digital piano to a computer (Windows or Mac)
1. Direct USB connection
a. Locate USB port on digital piano and computer
Find the USB port on both your digital piano and computer. These ports are typically located on the rear or side of the devices.
b. Connect USB cable between devices
Using the appropriate USB cable, connect your digital piano to your computer.
c. Install necessary drivers (if required)
Some digital pianos may require the installation of specific drivers for compatibility with your computer. Check the manufacturer’s website or manual for any necessary drivers and follow the installation instructions.
2. MIDI connection (5-pin DIN or 3.5mm TRS)
a. Connect MIDI cable to MIDI IN/OUT ports on digital piano
Locate the MIDI IN/OUT ports on your digital piano and connect the appropriate MIDI cable.
b. Connect other end of MIDI cable to computer or audio interface
Connect the other end of the MIDI cable to your computer or audio interface, depending on your setup.
c. Install necessary drivers (if required)
If necessary, install any required drivers for your MIDI connection or audio interface.
3. Setting up the software
a. Open DAW or virtual instrument software
Launch your preferred DAW or virtual instrument software on your computer.
b. Configure input and output settings
Navigate to the input and output settings in your DAW or virtual instrument software. Ensure that your digital piano is selected as the MIDI input device, and your computer or audio interface is selected as the MIDI output device.
c. Select the digital piano as the MIDI device
In the software, choose your digital piano as the active MIDI device. This allows the software to receive MIDI data from your digital piano.
d. Test the connection by playing a few notes
To confirm that the connection is successful, play a few notes on your digital piano. You should see the corresponding notes and data appear in your DAW or virtual instrument software.
C. Connecting a digital piano to an iPad or other iOS device
1. Direct USB connection
a. Locate USB port on digital piano and iPad
Find the USB port on both your digital piano and iPad. These ports are typically located on the rear or side of the devices.
b. Use USB Type A to B cable with an appropriate adapter (e.g., Lightning to USB Camera Adapter, USB-C to USB Adapter)
Connect your digital piano to your iPad using a USB Type A to B cable, along with an appropriate adapter such as a Lightning to USB Camera Adapter or a USB-C to USB Adapter.
c. Connect the devices and install necessary drivers (if required)
Connect your digital piano to your iPad using the cable and adapter. If necessary, install any required drivers for compatibility with your iPad.
2. MIDI connection (5-pin DIN or 3.5mm TRS)
a. Use a MIDI interface compatible with iOS devices (e.g., iRig MIDI 2)
Choose a MIDI interface that is compatible with iOS devices, such as the iRig MIDI 2.
b. Connect MIDI cable to MIDI IN/OUT ports on digital piano
Locate the MIDI IN/OUT ports on your digital piano and connect the appropriate MIDI cable.
c. Connect other end of MIDI cable to the MIDI interface
Connect the other end of the MIDI cable to your MIDI interface.
d. Connect MIDI interface to iPad using the appropriate adapter
Using the appropriate adapter, connect your MIDI interface to your iPad.
3. Setting up the software
a. Open an iOS-compatible DAW or virtual instrument app
Launch your preferred iOS-compatible DAW or virtual instrument app on your iPad.
b. Configure input and output settings
Navigate to the input and output settings in your DAW or virtual instrument app. Ensure that your digital piano is selected as the MIDI input device, and your iPad or MIDI interface is selected as the MIDI output device.
c. Select the digital piano as the MIDI device
In the app, choose your digital piano as the active MIDI device. This allows the app to receive MIDI data from your digital piano.
d. Test the connection by playing a few notes
To confirm that the connection is successful, play a few notes on your digital piano. You should see the corresponding notes and data appear in your DAW or virtual instrument app.
D. Connecting a digital piano to an Android device
1. Direct USB connection
a. Locate USB port on digital piano and Android device
Find the USB port on both your digital piano and Android device. These ports are typically located on the rear or side of the devices.
b. Use USB Type A to B or Type C cable with an appropriate adapter (e.g., USB OTG cable)
Connect your digital piano to your Android device using a USB Type A to B or Type C cable, along with an appropriate adapter such as a USB OTG cable.
c. Connect the devices and install necessary drivers (if required)
Connect your digital piano to your Android device using the cable and adapter. If necessary, install any required drivers for compatibility with your Android device.
2. MIDI connection (5-pin DIN or 3.5mm TRS)
a. Use a MIDI interface compatible with Android devices (e.g., iRig MIDI 2)
Choose a MIDI interface that is compatible with Android devices, such as the iRig MIDI 2.
b. Connect MIDI cable to MIDI IN/OUT ports on digital piano
Locate the MIDI IN/OUT ports on your digital piano and connect the appropriate MIDI cable.
c. Connect other end of MIDI cable to the MIDI interface
Connect the other end of the MIDI cable to your MIDI interface.
d. Connect MIDI interface to Android device using the appropriate adapter
Using the appropriate adapter, connect your MIDI interface to your Android device.
3. Setting up the software
a. Open an Android-compatible DAW or virtual instrument app
Launch your preferred Android-compatible DAW or virtual instrument app on your Android device.
b. Configure input and output settings
Navigate to the input and output settings in your DAW or virtual instrument app. Ensure that your digital piano is selected as the MIDI input device, and your Android device or MIDI interface is selected as the MIDI output device.
c. Select the digital piano as the MIDI device
In the app, choose your digital piano as the active MIDI device. This allows the app to receive MIDI data from your digital piano.
d. Test the connection by playing a few notes
To confirm that the connection is successful, play a few notes on your digital piano. You should see the corresponding notes and data appear in your DAW or virtual instrument app.
A. Summary of the blog
1. Importance of connecting digital pianos to various devices
Throughout this blog, we have highlighted the importance of connecting digital pianos to computers, iPads, or Android devices to unlock their full potential and enhance the user experience.
2. Steps to connect a digital piano to computers, iPads, or Android devices
We have also provided comprehensive steps on how to connect a digital piano to various devices, including the required equipment, preparations, and software setup.
B. Benefits of connecting digital pianos to other devices
1. Access to a wider range of sounds and effects
By connecting your digital piano to other devices, you can access a wider range of sounds and effects, expanding your creative possibilities and improving your music production capabilities.
2. Advanced recording and editing capabilities
Connecting a digital piano to a computer or mobile device allows you to record and edit your performances with greater ease and precision, taking advantage of the advanced features available in DAWs and virtual instrument software.
3. Opportunities for collaboration and sharing music with others
By integrating your digital piano with other devices, you can collaborate with other musicians more effectively, share your music with a wider audience, and even learn from the vast online resources and communities dedicated to digital music production.
C. Potential challenges and troubleshooting
1. Compatibility issues between devices and software
Although connecting a digital piano to various devices is generally straightforward, you may encounter compatibility issues between your devices and software. Always consult your digital piano manual, the manufacturer’s website, and software documentation to ensure proper compatibility.
2. Latency and performance issues
Some users may experience latency or performance issues when connecting a digital piano to a computer or mobile device. To minimize these issues, ensure your devices are running the latest software updates and drivers, and use high-quality cables and audio interfaces.
3. Solutions for common problems and resources for further assistance
If you encounter any problems or challenges when connecting your digital piano to other devices, seek out online resources, forums, and user communities for assistance and troubleshooting tips. Many digital piano manufacturers also offer customer support to help you resolve any issues.
D. Encouragement for musicians to explore new technologies
1. Embrace the possibilities of digital music-making
As a musician, it’s essential to embrace the possibilities of digital music-making and not shy away from the ever-evolving world of technology. By learning how to connect your digital piano to various devices, you can greatly expand your creative horizons.
2. Enhance creativity and musical expression through technology
Utilizing technology in your music production process can help you enhance your creativity and musical expression. The limitless possibilities offered by digital pianos, computers, and mobile devices allow you to explore new sounds, techniques, and approaches to making music.
3. Continuous learning and adaptation in the ever-evolving world of music production
As technology continues to advance and shape the world of music production, it’s crucial for musicians to learn and adapt continually. By staying informed about new developments, techniques, and tools, you can ensure that your music remains relevant and innovative in the rapidly changing musical landscape.